
12 BEAUTIFUL Pop Piano Fills & Licks
MARINE LACOSTE / FILLS / MAY 2, 2025
Download the Sheet Music
More Lessons

MARINE LACOSTE / FILLS / MAY 2, 2025
Download the Sheet Music
More Lessons

MARINE LACOSTE / ARTICLE / Feb 2, 2024
MARINE LACOSTE / OARTICLE / Feb 2, 2024
Have you ever felt a great motivation to start playing the piano, but a few months later, all that energy and enthusiasm seemed to have disappeared?
And now you’re just waiting for that motivation to come back? Questioning yourself if this is even for you. Well, we’ve all been there!
In this video I want to share with you the difference between motivation and discipline, why you need both of them and how they can help you overcome procrastination in your practice.
But first, let’s talk about Why Most People Struggle to Stay Motivated.
One of the main reasons is the lack of Immediate reward. Human beings often seek instant gratification. When working towards long-term goals, the delayed rewards can make it hard to stay motivated, especially if progress seems slow.
Also, we tend to aim for unrealistic goals or to have a lack of clarity. Setting goals that are too ambitious or not having a clear, achievable plan can lead to frustration and a decrease in motivation.
So now, Imagine motivation as lighting a match. It’s that initial spark, the exciting burst of energy when you start a new project. It’s powerful, but like a match, it’s short-lived.
Motivation gets you started. It’s the reason you first sat down at the piano, filled with dreams of melodies and harmonies. But relying only on motivation is like expecting a single match to keep you warm all night.
That’s when discipline comes in!
Discipline is an ongoing process, like tending to a hearth. It’s not as glamorous as the spark, but it’s what keeps the fire burning.
With discipline, you practice on a regular basis, even when you don’t feel like it. It’s setting a schedule, creating habits, sticking to it, and slowly watching your skills grow. Discipline is what turns that initial spark of motivation into a lasting flame.
It’s what truly makes us grow in life.
An excellent book about creating habits is Dans son livre, il explique en détail l’importance de construire de solides habitudes pour notre évolution personnelle.
Maintenant, tu te demandes peut-être, pourquoi ne pas juste compter sur l’un ? La vérité est que la motivation et la discipline se complètent. La motivation est ton point de départ, la raison pour laquelle tu entames ce voyage. La discipline est la carte et le véhicule qui te maintiennent sur le chemin.
Sans motivation, la passion n’existerait pas mais la discipline la rend possible. Ensemble, elles assurent non seulement que tu commences, mais aussi que tu continues, surtout à travers les défis et les moments de doute.
La discipline est quelque chose que tu fais, et choisis de faire ; la motivation est une chose qui peut venir et partir, que tu ne peux pas choisir de faire ou de contrôler.
Alors, tout comme le feu a besoin de nouveaux bûches pour survivre, tes objectifs et tes rêves ont besoin d’un effort continu pour grandir. Alors, comment peux-tu surmonter la procrastination ?
Il s’agit d’utiliser à la fois la motivation et la discipline. Commence par te connecter avec ta motivation. Souviens-toi pourquoi tu as commencé, revisite tes objectifs et visualise ton succès. Ensuite, renforce-le avec la discipline et de solides habitudes.
Crée une routine, divise les tâches en étapes plus petites, écris des objectifs à court et à long terme et célèbre les petites victoires. Souviens-toi, la cohérence est la clé.
Tandis que la motivation est l’étincelle qui allume le feu, la discipline est ce qui le maintient brûlant. Ensemble, elles forment un duo puissant qui peut t’aider à surmonter la procrastination et à atteindre tes objectifs.
Founder of Online Rock Lessons, Marine is the keyboardist for Uncle Kracker, Corey Hart and Highway Hunters.
With over 20 years of experience in show business, Marine is launching the first Canadian Music School dedicated to rock and blues lovers.
More Lessons


MARINE LACOSTE / ORGAN / OCT 20, 2023
The Hammond B3 is a favourite among producers for its warm vibes, killer stereo action, and its powerful sound for laying down a solid harmonic groove without stealing all the spotlight in a mix.
That’s why it’s the go-to when you’re scratching your head, wondering what to play in a song that didn’t think it needed a piano or keyboard. It’s the secret element that gives a rock-solid foundation to the whole band without stealing the show or flipping the vibe upside down.
So, in this video of Rockin’ Like a Hurricane by Scorpions, I’m gonna give you a taste of what this legendary song would be like if we threw in some Hammond B3 magic! 🎹✨
MARINE LACOSTE / ORGUE / OCT 20, 2023
L’orgue Hammond est l’un des instruments les plus appréciés par les producteurs pour sa capacité à fournir une base harmonique solide sans prendre trop de place dans un band. C’est pourquoi c’est l’instrument parfait à ajouter en tant que claviériste sur une chanson qui n’a pas initialement de piano ou de clavier.
Ça te permettra de fournir une base solide à tous les membres de ton band sans enlever ou changer complètement l’ambiance de la chanson que vous jouez.
Dans cette vidéo de “Rock You Like a Hurricane”, je vais te montrer comment ça sonnerait si j’ajoutais de l’orgue sur cette chanson légendaire! 🎹✨
Founder of Online Rock Lessons, Marine is the keyboardist for Uncle Kracker, Corey Hart and Highway Hunters.
With over 20 years of experience in show business, Marine is launching the first Canadian Music School dedicated to rock and blues lovers.
More Lessons
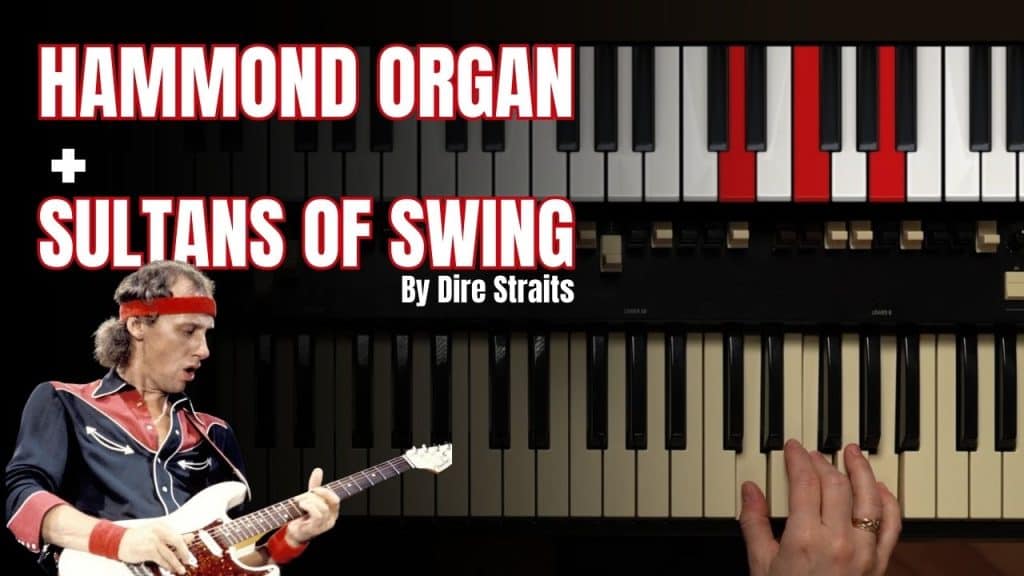
MARINE LACOSTE / ORGAN / July 14, 2023
One of my favorite thing to do, is to add keyboard parts to amazing rock songs!
I think that the Hammond Organ is one of the most versatile keyboard for rock, pop, blues and so many musical style.
So in this lesson, I’ll show you how I would add some Hammond organ to a legendary tune like Sultans of Swing (Dire Straits) if I was in a rock band context.
If you’re a Hammond Organ fan just like me
Une chose que j’adore faire c’est d’ajouter des parties de claviers sur des chansons rock célèbre!
Je crois que l’orgue Hammond est un des types de claviers les plus versatile qui existent pour le rock, le pop, le blues et tellement d’autres styles musicaux.
Donc dans cette leçon, je vais te montrer comment tu peux ajouter de l’orgue Hammond à la célèbre chanson Sultans of Swing (Dire Straits) si je jouais dans un contexte de groupe live.
Si tu es un fan d’orgue Hammond tout comme moi,
Return to Blog
Founder of Online Rock Lessons, Marine is the keyboardist for Uncle Kracker, Corey Hart and Highway Hunters.
With over 20 years of experience in show business, Marine is launching the first Canadian Music School dedicated to rock and blues lovers.
More Lessons

MARINE LACOSTE / ARTICLE / FEB 9, 2023
Have you ever asked yourself: Do online piano lessons really work? Will it work for me?
While in-person piano lessons have been the traditional go-to for learning, online lessons have taken popularity in the last few years.
I felt it would be a great idea to compare the two so you can better choose what fits your needs.
There’s no secret that private piano lessons can be very expensive. The usual rate for a traditional one-on-one lesson of 60 minutes varies between 50$ and 60$. It can build up to more than 3000$ a year easily.
Conversely, subscription-based online teaching will give you access to hundreds of lessons for a lot less than that. You can also get annual or monthly options to make it easier on your budget!
Whether it’s piano lessons or anything you want to learn, scheduling is the key. To see progress with piano lessons you need to be consistent. For private lessons, that means leaving the house to go to the lessons on a regular basis and working with all the planning conflicts.
I find that online piano lessons are perfect for those who are busy and are looking for more convenience. When you have access to an online academy full of courses, you can easily learn at your own pace and at home. No need to take the car to go to the lessons.
Some of us need time to learn something while others are fast-paced. With online lessons, you don’t have to spend hours on things that are too easy for you and can easily move on to what you need to practice.
Private lessons are often much slower, mostly because teachers can get really specific with what they need you to do.
That can be a very good thing if you need specific guidance and correction.
In-person lessons usually offer more guidance than online lessons because you have a piano teacher sitting next to you. In most of the online courses, you won’t have access to real teachers looking at what you’re doing to make sure you’re on the right path…
That is why at the Online Rock Lessons academy we’re offering regular live stream! So our students can show their progress and get feedback from real teachers. I think it’s a very important part of the progress.
A beautiful thing that came out of online learning is the possibility of learning with wonderful teachers even if they are across the planet.
It offers you to learn from the best and be able to choose who you want to learn from.
In-person teaching will limit you to the teachers close to you. Depending on where you are, it might even be challenging to find a piano teacher.
Another cool thing about online lessons is the ability to replay and slow down the lessons. That’s a great tool I’ve been using personally to learn for a long time. I find it easier to master everything when I’m at home alone and calm.
This allows you to focus on specific parts of the lessons that are more difficult and replay what the teacher was showing. Most in-person piano teachers don’t allow recording the lessons for many reasons.
Alright! There it is.
I hope this will help you see what type of teaching is best for you!
If you want to start with online learning, pour commencer maintenant et accéder à une incroyable académie de piano remplie de masterclasses amusantes, de tutoriels de chansons, de live stream et bien plus encore.
Founder of Online Rock Lessons, Marine is the keyboardist for Uncle Kracker, Corey Hart and Highway Hunters.
With over 20 years of experience in show business, Marine is launching the first Canadian Music School dedicated to rock and blues lovers.
More Lessons
MARINE LACOSTE / Chording / JAN 19, 2023
MARINE LACOSTE / Chording / JAN 19, 2023
In this lesson, we will learn how to transpose any chord progression in three simple steps.
We will use the chord progression I-V-vi-IV for this exercise. This progression is very common in pop music. It can be heard in songs such as Demons by Imagine Dragon and Cryin’ by Aerosmith.
We will start by learning how to pair the right notes with the right degrees. Let’s use the G major scale. This scale is composed of the notes G-A-B-C-D-E-F#-G. It has one sharp note (F#).
Now that we know the notes of the G major scale, we will pair degrees to each note. The G note is associated with the first degree, the A note is associated with the second degree, the B note is associated with the third degree, the C note is associated with the fourth degree, the D note is associated with the fifth degree, the E note is associated with the sixth degree, finally, the F# note is associated with the seventh degree. This principle is the same for all keys. For example, in the C major scale, the C note is associated with the first degree, the D note is associated with the second degree, the E note is associated with the third degree, the F note is associated with the fourth degree the G note is associated with the fifth degree, the A note is associated with the sixth degree, finally, the B note is associated with the seventh degree.
Depending on the key, the degrees will be associated with different notes. For example, the first degree of the G major scale is G whereas the first degree of the C major scale is C.
We will now find the chords associated with the different degrees of a major scale. Let’s keep using the G major scale to demonstrate this step.
To easily find the notes of a chord, you can start by placing your first finger on the note of the first degree (G), then you skip the next note (A), you place your third finger on the next note (B), then you skip the next note (C), and finally, you place your fifth finger on the next note (D). You are now playing a G major chord. In other words, the notes of a chord are situated at a one note distance from one another. This process has to be executed on all degrees. To do so, you simply move your hand to the next note. Your first finger moves from G to A, your third finger moves from B to C and your third finger moves from D to E, you now have the notes of the chord of the second degree of the G major scale (A minor). While doing this process on every degree of the scale, keep in mind the sharp note (F#). The chords have to be composed exclusively of notes from the G major scale.
Now that we know the chords associated with the degrees of the G major scale, we will apply them to the I-V-vi-IV progression. The chord of the first degree of the G major scale is G major, the chord of the fifth degree is D major, the chord of the sixth degree is E minor and the chord of the fourth degree is C major. The I-V-vi-IV progression in the key of G major is G-D-Em-C.
In order to transpose the progression in another key, we simply need to apply the same degrees of the desired progression to a different scale. To do so, you can execute the same three steps we did earlier.
Let’s transpose our progression in the key of E major. The notes of this major scale are E-F#-G#-A-B-C#-D#-E.
The first step is to assign the right notes to the right degrees. In the E major key, the note associated with the first degree is E, the note associated with the second degree is F#, the note associated with the third degree is G#, the note associated with the fourth degree is A, the note associated with the fifth degree is B, the note associated with the sixth degree is C# and the note associated with the seventh degree is D#.
The second step is to find the right chords associated with the different degrees of the E major scale. To do so, you can proceed with the exercise of playing the three notes starting on the note of the first degree (E), that are situated at a one note distance from one another, then slide your hand to the next notes to find all the chords associated with all the degrees.
In order to play the right chords, it is important to keep in mind that there are four sharp notes in the key of E major.
The final step is to apply the chords of the E major scale to the I-V-vi-IV progression. The chords are E-B-C#min-A.
Let’s transpose our progression in the F major key. The notes of this scale are F-G-A-Bb-C-D-E-F.
The first step is to assign the right notes to the right degrees. In the F major key, the note associated with the first degree is F, the note associated with the second degree is G, the note associated with the third degree is A, the note associated with the fourth degree is Bb, the note associated with the fifth degree is C, the note associated with the sixth degree is D and the note associated with the seventh degree is E.
The second step is to find the right chords associated with the different degrees of the F major scale. To do so, you can proceed with the exercise of playing the three notes starting on the note of the first degree (F), that are situated at a one note distance from one another, then slide your hand to the next notes to find all the chords associated with all the degrees.
In order to play the right chords, it is important to keep in mind that there is one flat note in the key of F major (which is Bb).
The final step is to apply the chords of the F major scale to the I-V-vi-IV progression. The chords are F-C-Dmin-Bb.
It is interesting to note that no matter what major key you are playing in, the quality of the degrees stays the same. This means that the first degree is always associated with a major chord, the second and third degrees are always associated with a minor chord, the fourth and fifth degrees are always associated with a major chord, the sixth degree is always associated with a minor chord and the seventh degree is always associated with a minor flat 5 degree. Remembering this is key to getting better at transposing.
You now know how to transpose chord progressions in any key. It is now time to practice!
Text Transcription by Andreane Boucher
Dans cette capsule, nous allons apprendre à transposer une progression d’accords dans n’importe quelle tonalité, en trois étapes.
La progression utilisée dans cette leçon est la I-V-vi-IV. Cette progression est très commune dans la musique populaire. Elle est présente dans les chansons Demons d’Imagine Dragon ainsi que Cryin’ d’Aerosmith.
Nous allons commencer par trouver les notes liées aux degrés d’une gamme majeure. Prenons la gamme de Sol majeur. Celle-ci est composée des notes sol-la-si-do-ré-mi-fa#-sol. Elle possède donc un dièse à l’armure.
Nous allons d’abord assigner des chiffres, donc des degrés à chacune des notes de la gamme. Dans la gamme de Sol majeur, le premier degré est associé à sol, le deuxième degré à la, le troisième degré à si, le quatrième à do, le cinquième degré à ré, le sixième degré à mi et le septième degré à fa#. Ce principe de degrés est le même dans n’importe quelle gamme ou tonalité. Par exemple, dans la gamme de Do majeur, le premier degré est associé à do, le deuxième degré à ré, le troisième degré à mi, le quatrième degré à fa, le cinquième degré à sol, le sixième degré à la et le septième degré à si.
Les notes associées aux degrés seront donc différentes dans chaque tonalité. Comme nous venons de le constater, le premier degré dans la tonalité de Sol majeur est sol, alors que dans la tonalité de Do majeur, le premier degré est do.
Nous allons maintenant trouver les accords liés aux degrés d’une gamme majeure. Prenons toujours la gamme de Sol majeur.
Pour facilement trouver les notes de nos accords et de façon visuelle, nous posons notre doigt #1 sur la note du premier degré (sol), nous sautons la prochaine (la), nous posons notre doigt #3 sur la prochaine note (si) et nous sautons encore la prochaine (do), puis nous posons un doigt sur la prochaine note (ré), ce qui nous donne notre accord de Sol majeur. En d’autres mots, les notes de l’accord sont à une distance d’une note les unes des autres. Ce processus se répète pour les autres degrés, nous n’avons qu’à glisser notre main à la note suivante, le doigt #1 passe de sol à la, le doigt #3 passe de si à do et le doigt #5 passe de ré à mi, ce qui nous donne l’accord du deuxième degré (La mineur). Il ne faut pas oublier que lorsqu’on a affaire à un fa, celui-ci est un fa#, puisque la tonalité de sol majeur possède un dièse à l’armure (le fa#). Il faut garder en tête que les accords sont obligatoirement composés des notes de la gamme de Sol majeur.
Maintenant que nous connaissons les accords de chacun des degrés de la gamme de Sol majeur, nous allons appliquer ceux-ci à la progression d’accords I-V-vi-IV. L’accord du premier degré de la gamme de Sol majeur est Sol majeur, l’accord du cinquième degré est Ré majeur, l’accord du sixième degré est Mi mineur et l’accord du quatrième degré est Do majeur. La progression I-V-vi-IV dans la tonalité de Sol majeur est donc G-D-Emin-C.
Afin de transposer notre progression dans une autre tonalité, nous devons simplement appliquer les degrés de la progression désirée à une gamme différente. Pour ce faire, nous pouvons exécuter les trois étapes expliquées ci-dessus.
Prenons la gamme de Mi majeur. Les notes de cette gamme sont mi-fa#-sol#-la-si-do#-ré#-mi.
La première étape est d’assigner les bons degrés aux notes de la gamme. La note associée au premier degré est mi, celle du deuxième degré est fa#, celle du troisième degré est sol#, celle du quatrième degré est la, celle du cinquième degré est si, celle du sixième degré est do# et celle du septième degré est ré#.
La deuxième étape est de trouver les accords associés à chaque degré de la gamme. Pour ce faire, nous pouvons procéder à l’exercice de jouer les trois notes situées à une note de distance l’une de l’autre, puis glisser sa main au prochain degré pour trouver le prochain accord. Il faut continuer de garder en tête les quatre dièses de cette tonalité afin de jouer les bons accords.
La troisième étape consiste à appliquer nos accords à la progression I-V-vi-IV. Dans la tonalité de Mi majeur, les accords de la progression sont E-B-C#min-A.
Prenons la gamme de Fa majeur. Les notes de cette gamme sont fa-sol-la-sib-do-ré-mi-fa.
La première étape est d’assigner les bons degrés aux notes de la gamme. La note associée au premier degré est fa, celle du deuxième degré est sol, celle du troisième degré est la, celle du quatrième degré est sib, celle du cinquième degré est do, celle du sixième degré est ré et celle du septième degré est mi.
La deuxième étape est toujours de trouver les accords associés à chaque degré de la gamme en exécutant l’exercice de jouer les trois notes qui sont situées à une note de distance l’une de l’autre, puis glisser sa main au prochain degré pour trouver le prochain accord. Il faut continuer de garder en tête le bémol à l’armure (sib) afin de jouer les bons accords.
La troisième étape consiste toujours à appliquer nos accords à la progression I-V-vi-IV. Dans la tonalité de Fa majeur, les accords de la progression sont F-C-Dmin-Bb.
Il est pertinent de constater que peu importe la tonalité majeure, la qualification des degrés reste la même. C’est-à-dire que, le premier degré est toujours majeur, le deuxième et le troisième sont toujours mineurs, le quatrième et le cinquième sont toujours majeurs, le sixième est toujours mineur et le septième est toujours mineur bémol 5. En sachant ceci, la transposition devient de plus en plus facile.
Maintenant que vous connaissez les étapes de transposition, il est temps d’aller s’entraîner avec différentes progressions et tonalités afin de devenir rapide et efficace!
Transcription par Andréane Boucher
Founder of Online Rock Lessons, Marine is the keyboardist for Uncle Kracker, Corey Hart and Highway Hunters.
With over 20 years of experience in show business, Marine is launching the first Canadian Music School dedicated to rock and blues lovers.
Get the Free Course
More Lessons

MARINE LACOSTE / ORGAN / Nov 18, 2022
MARINE LACOSTE / ORGAN / Nov 18, 2022
I will always remember the time when I joined my first rock band as a teenager. We were playing cover songs of the biggest hits of the 60s through the 90s.
A lot of these songs had no keyboard parts. I was either not playing on that song or doubling the guitar riffs…
It’s only years later that I discovered the Hammond organ. Learning this unique instrument made me realize how much it was a very versatile instrument but also how a great addition it was to just about any rock, pop and blues songs.
In this lesson, I’ll show you how I would add some Hammond organ to a legendary tune like Highway to Hell (ACDC) if I was in a rock band context.
Je me souviendrai toujours de l’époque où j’ai rejoint mon premier groupe de rock. On faisait des reprises de chansons super connues des années 60 à 90.
D’ailleurs, beaucoup de ces chansons n’avaient aucune partie de claviers. Je me retrouvais donc à ne pas jouer pour cette chanson ou à simplement doubler une ligne de guitare…
Ce n’est que plusieurs années plus tard dans mon parcours que j’ai découvert l’orgue Hammond. L’apprentissage de cet instrument unique m’a fait réaliser à quel point il était versatile et qu’il était un bel ajout à pas mal n’importe quelle chanson rock, pop ou blues.
Dans cette leçon, je te montre comment j’ajouterais de l’orgue Hammond sur une pièce rock légendaire tel que Highway to Hell (ACDC) si j’étais dans un contexte de groupe.
Founder of Online Rock Lessons, Marine is the keyboardist for Uncle Kracker, Corey Hart and Highway Hunters.
With over 20 years of experience in show business, Marine is launching the first Canadian Music School dedicated to rock and blues lovers.
More Lessons

MARINE LACOSTE / ARTICLE / NOV 4, 2022
Do you feel like you’re not progressing as fast as you think you would?
Today I want to talk to you about 5 tips to help you progress at the piano!
When we start learning piano, very often we see this huge mountain of information to learn.
This is why it’s important to fix small short term goals to always progress.
You can start with simple things just like:
Take time to write down these goals in a notebook to keep a follow-up of your progress. In a few months, you’ll be able to see all the progress you’ve made!
You probably already heard that there’s no secret in music, you have to practice and play to progress.
I always advise my students to start with a regular practice routine of 10-15 minutes for a minimum of 2 to 5 times a week. And slowly increase to practice 30 to 60 minutes 5 to 7 times a week.
Always keep a good balance between having fun and practicing to develop new skills.
Start slow and see what works best for you!
The busy schedule syndrome … I know that. The only way I will do something it’s if it’s booked in my calendar.
The trick is to pick a moment that works for you, that you know you can sit at the piano and to write it down in your schedule. This way, you will already have set aside that time to practice and you will limit the excuses for not doing it.
Your work environment makes all the difference in the quality of your practices. Remember to install your piano in a quiet place, where you can ideally close the door if necessary. Put aside distractions like phones and ringtones to get yourself into a good practice mood.
The number one reason why we want to learn the piano is the desire to play the songs that we love. Well the good news is, you don’t have to wait years before playing what you love. In fact, there are so many versions of the same song that you can start right away. Start by making a list of all the songs you dream of playing and do some research to find the right sheet music for your level!
If you need help, don’t hesitate to reply to this email. I’ll be happy to help you out with your search.
There you go with my 5 tips, I hope it will inspire you and give you some comfort.
Don’t forget that no matter what, learning piano needs to stay fun!
Happy Practicing
As-tu l’impression de ne pas avancer aussi vite que tu le pensais?
Aujourd’hui je veux te parler de 5 astuces qui m’ont beaucoup aidé à progresser rapidement au piano.
Quand on commence à apprendre le piano, on a très souvent tendance à voir une immense montagne d’informations à apprendre. C’est pour cette raison que c’est important de se fixer des buts à court terme pour toujours progresser.
Tu peux commencer avec des buts simples comme :
Prends le temps d’inscrire ces buts dans un cahier de note pour garder un suivi de ton avancement. Dans quelques mois, tu vas pouvoir analyser tous les progrès que tu auras fait!
Tu as sûrement déjà entendu qu’il n’y a pas de secret en musique et qu’il faut pratiquer, jouer pour avancer…
Je conseille toujours à mes élèves de commencer par une pratique régulière de 10-15 minutes, pour un minimum de 2 à 5 fois par semaine. Et tranquillement augmenter pour pratiquer de 30 à 60 minutes de 5 à 7 fois par semaine.
Toujours garder un bon équilibre entre le plaisir de jouer et la répétition pour développer de nouvelles compétences.
Commence tranquillement et vois ce qui te convient le mieux!
Le syndrome de l’horaire chargé… je connais. La seule façon pour que j’accomplisse quelque chose, c’est que ce soit bloqué dans mon horaire.
Le truc c’est de choisir un moment qui te convient, que tu sais que tu peux t’installer au piano et de l’écrire dans ton horaire. De cette façon tu auras déjà réservé ce temps pour pratiquer et tu limiteras les excuses pour ne pas le faire.
Ton environnement de travail fait toute la différence dans la qualité de tes pratiques. Pense à installer ton piano dans un endroit calme, où tu peux idéalement fermer la porte au besoin. Mets de côté les distractions comme les téléphones et les sonneries pour te mettre dans une bonne ambiance de pratique.
La raison no1 qui nous motive à apprendre le piano c’est le désir de jouer les chansons qu’on aime. Et bien bonne nouvelle, tu n’as pas besoin d’attendre des années avant de jouer ce qui te fait tripper! En fait, il existe tellement de versions d’une même chanson que tu peux commencer dès maintenant. Fais une liste des chansons que tu rêves le plus de jouer et fais quelques recherches pour trouver des partitions adaptées à ton niveau!
Si tu as besoin d’aide, hésite pas à répondre à ce courriel et à m’écrire, ça va me faire plaisir de te donner un coup de main dans ta recherche.
Voilà pour mes 5 astuces j’espère que ça te donne de l’inspiration et du réconfort!
N’oublie pas que malgré tout ça, apprendre le piano doit rester le fun!
Bonne pratique!
Founder of Online Rock Lessons, Marine is the keyboardist for Uncle Kracker, Corey Hart and Highway Hunters.
With over 20 years of experience in show business, Marine is launching the first Canadian Music School dedicated to rock and blues lovers.
More Lessons

MARINE LACOSTE / CHORDING / OCT 28, 2022
MARINE LACOSTE / CHORDING / OCT 28, 2022
In this lesson, we will learn how to play three super useful left hand grooves to play at the piano.
The grooves are in the key of D minor, which has one flat note (Bb) and will be based on the chord progression i-VI-III-VII. In the key of D minor, the chords of this progression are Dm, Bb, F and C.
The first groove is fairly simple. It is a mix of half notes, quarter notes and eighth notes.
Since the goal of today’s exercise is to practice grooves played by the left hand, the right hand only plays simple chords in whole notes to create a harmonic support.
The left hand follows a specific formula throughout the whole chord progression. For this groove, we need the notes of the first and fifth degree of our chords. Let’s find the notes of these degrees for the D minor chord. The note of the first degree of the D minor scale is D and the note of the fifth degree of the D minor scale is A. Let’s find the notes of the degrees of the F chord. Its first degree is F and its fifth degree is C.
The rhythm of this groove is as follows : quarter note, eighth note, eighth note, half note. In our progression, we spend two beats on each chord. So, we play the quarter note and the two eighth notes with the notes of the first and fifth degree of the D minor chord (D and A). Then, we move on to the half note played with the note of the first degree of the Bb chord. We repeat this pattern with the two remaining chords of our progression, F and C. The quarter note and the two eighth notes are played with the notes of the first and fifth degree of the F chord (F and C). Then we move on to the half note played by the first degree of the C chord (C).
Here is our groove #1 written down:
The second groove is used very often in different genres. It is emulating what the bassist often plays in a group. The rhythm of this groove is as follows: dotted quarter note, eighth note, half note.
In this groove, we stay all four beats on each chord of the progression and we only use the note of the first degree of each chord.
The right hand keeps playing chords in whole notes for harmonic support.
The left hand plays the rhythm. On the D minor chord, we play the dotted quarter note, the eight note and the half note with a D. Then, on the Bb chord, we play the dotted quarter note, the eight note and the half note with a Bb. For the F chord, we play the dotted quarter note, the eight note and the half note with an F and finally for the C chord, we play the same rhythm but with a C.
Dotted quarter notes may be new to you. If so, it is very important to internalize this new rhythm by counting out loud “1 – and – two – and – three – and – four – and” while playing the groove. You can even start by clapping the rhythm with your hands while counting out loud “1 – and – two – and – three – and – four – and”. The dotted quarter note falls on the “1”, the quarter note falls on the “and” of the 2 and the half note falls on the “3”.
Here is our groove #2 written down:
The third groove is an arpeggiated accompaniment. This type of groove sounds particularly great on the piano. The rhythm of this groove is all quarter notes.
The right hand is still playing chords in whole notes to ensure harmonic support
The left hand follows a specific formula throughout the whole progression. We use the degrees I-V-I-V-III-V-I-V (make sure to look at the sheet music of this groove to play it correctly since the degrees can be played on different octaves) which are based on the scale of every chord of the progression. The notes of the I-V-I-V-III-V-I-V pattern in D minor are D-A-D-A-F-A-D-A. The notes of the pattern of the Bb chord are Bb-F-Bb-F-D-F-Bb-F. The notes of the pattern of the F chord are F-C-F-C-A-C-F-C. Finally, the notes of the pattern of the C chord are C-G-C-G-E-G-C-G.
Here is our groove #3 written down:
You now know three new ways to play accompaniments with your left hand. Make sure to transpose them in all keys and try different progressions to really master your grooves!
Text Transcription by Andreane Boucher
Dans cette leçon, nous allons apprendre à jouer trois grooves super utiles à la main gauche.
Les grooves de cette capsule sont en ré mineur. Cette tonalité ne contient qu’un seul bémol (sib). De plus, ceux-ci sont basés sur la progression d’accords i-VI-III-VII. Dans la tonalité de ré mineur, cette progression est composée des accords suivants : Dm (ré mineur), Bb (sib), F (fa) ainsi que C (do).
Le premier groove est un accompagnement assez simple qui est un mélange rythmique de croches, de noires et de blanches.
Puisque le but de l’exercice d’aujourd’hui est de travailler l’accompagnement à la main gauche, la main droite vient simplement plaquer les accords en ronde pour offrir un support harmonique.
La main gauche, elle, suit une formule spécifique tout au long de la progression. Nous utilisons les premiers et cinquièmes degrés de nos accords. Commençons avec l’accord de Ré mineur, son premier degré est ré et son cinquième degré est la. Faisons le même chemin pour l’accord de Fa, son premier degré est fa et son cinquième degré est do.
La rythmique de ce groove est la suivante : noire, deux croches, blanche. Dans notre progression, nous restons deux temps sur l’accord de Ré mineur, donc la noire et les deux croches sont jouées avec les notes des degrés I et V de celui-ci (ré et la). Puis, nous restons deux temps sur l’accord de Sib donc, la blanche sera jouée par le degré I de Sib (sib). Dans la prochaine mesure, nous répétons ce pattern avec l’accord de Fa et de Do. Nous restons deux temps sur l’accord de Fa, donc la noire et les deux croches sont jouées avec les notes des degrés I et V de celui-ci (fa et do). Puis, nous restons deux temps sur l’accord de Do, donc la blanche est jouée par le degré I de Do (do).
Voici le groove #1 écrit :
Le deuxième groove est un accompagnement très souvent utilisé qui imite la rythmique qu’un bassiste joue souvent dans un contexte de groupe. Celle-ci est la fameuse noire pointée, croche, blanche.
Dans cet exercice, nous restons quatre temps sur chaque accord et nous utilisons seulement le degré I de chaque accord.
La main droite continue de jouer son rôle de support harmonique en jouant les accords en rondes.
À la main gauche, lors de l’accord de Ré mineur, nous jouons noire pointée, croche blanche sur des ré. Puis, nous allons à notre accord de Sib, tout en jouant noire pointée, croche, blanche, mais cette fois sur des sib. Nous poursuivons à l’accord de Fa, nous faisons toujours la même rythmique, mais sur des fa et finalement, nous allons à l’accord de Do tout en faisant la même rythmique, mais sur des do.
Si le concept des noires pointées est nouveau, il est important de prendre le temps de bien l’intérioriser en comptant à voix haute « 1 – et – 2 – et – 3 – et – 4 – et » tout en jouant le groove. Il est également efficace de taper des mains la rythmique en comptant à voix haute avant d’essayer de le jouer au piano. La noire pointée vaut un temps et demi, donc elle est jouée sur le « 1 » et la croche qui suit est jouée sur le « et du 2 », puis la blanche est jouée sur le « 3 ».
Voici le groove #2 écrit :
Le troisième groove est un accompagnement arpégé. Celui-ci est un style très pianistique. La rythmique de ce pattern n’est composée que de croches.
Encore une fois, la main droite continue d’assurer son rôle de support harmonique en jouant les accords en rondes.
À la main gauche, nous utilisons une formule que nous allons transposer sur chacun des accords de notre progression. Dans cette formule, nous utilisons les degrés I-V-I-V-III-V-I-V (fiez-vous à la partition ci-dessous pour la hauteur des degrés puisque le pattern s’étend sur plus d’un octave, donc le I peut se trouver à des hauteurs différentes) de la gamme de chaque accord. Sur l’accord de Ré, le pattern I-V-I-V-III-V-I-V est le suivant : ré-la-ré-la-fa-la-ré-la. Sur l’accord de Sib, les notes du pattern sont sib-fa-sib-fa-ré-fa-sib-fa. Sur l’accord de Fa, les notes du pattern sont fa-do-fa-do-la-do-fa-do. Puis, sur l’accord de Do, les notes du pattern sont do-sol-do-sol-mi-sol-do-sol.
Voici le groove #3 écrit :
Maintenant que vous connaissez trois nouveaux grooves de main gauche, n’oubliez pas de vous amuser à les transposer afin de pouvoir les appliquer à toutes les progressions et tonalités. Bonne pratique!
Transcription par Andréane Boucher
Get the Sheet Music
Télécharger les partitions
Founder of Online Rock Lessons, Marine is the keyboardist for Uncle Kracker, Corey Hart and Highway Hunters.
With over 20 years of experience in show business, Marine is launching the first Canadian Music School dedicated to rock and blues lovers.
More Lessons
Please confirm you want to block this member.
You will no longer be able to:
Please note: This action will also remove this member from your connections and send a report to the site admin. Please allow a few minutes for this process to complete.